How to Make a Privacy Screen from Old Louvered Doors
Transform your exposed balcony into a private oasis without breaking the bank or your rental agreement. This guide shows how to upcycle old louvered doors into a chic, modular privacy screen that lets you control light and airflow.
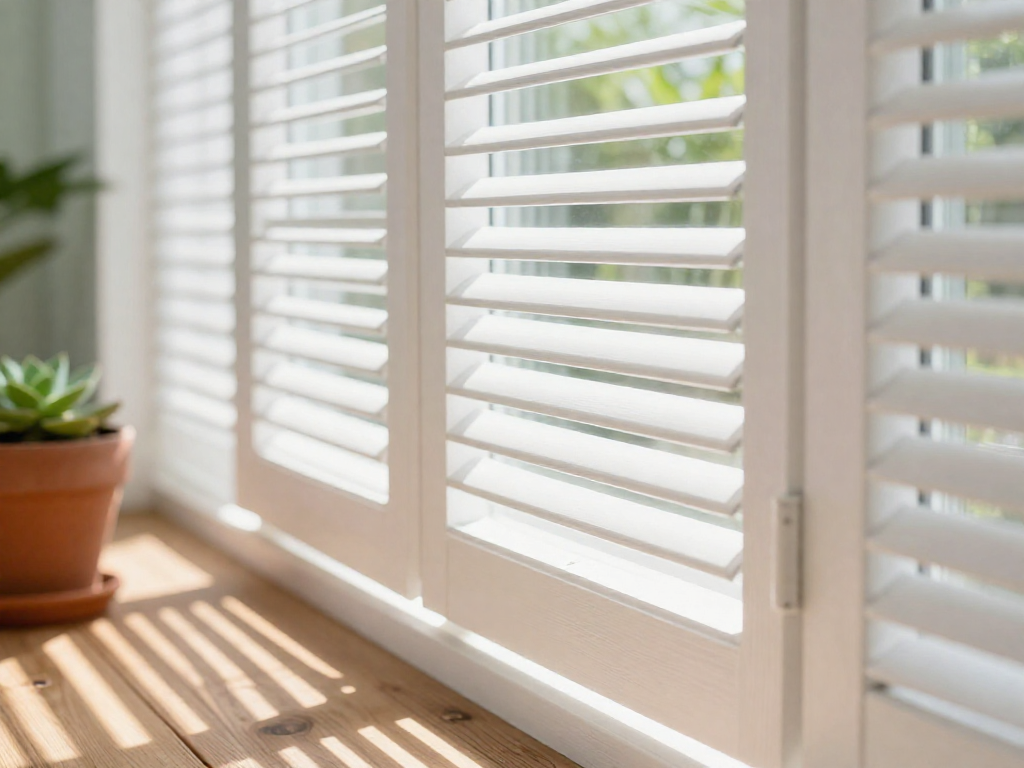
Why Louvered Doors? Benefits and Design Inspiration
Louvered doors are a clever choice for a DIY balcony privacy screen, blending function with flair. Whether you're looking to block a neighbor's view, soften harsh sunlight, or simply add character to your outdoor space, these salvaged gems deliver on all fronts.
The slatted design lets you angle the louvers to control both privacy and light. Tilt them open to let in a breeze and a view of the sky, or close them tight when you want a cozy, secluded nook. This flexibility means your screen adapts throughout the day—no permanent block-out needed.
Old louvered doors carry a unique architectural history that mass-produced screens can't match. Their weathered wood, distressed paint, or classic shapes instantly inject personality into a bare balcony. They pair beautifully with plants, string lights, or bistro sets, making your space feel like a curated urban retreat.
Because they're typically made of thin wood slats in a light frame, louvered doors are easy to handle even in tight stairwells. You can lean them against a railing, hang them with removable hooks, or connect several with hinges for a folding screen—all without drilling into walls. That's a renter's dream: privacy that leaves zero trace.
Scored secondhand, these doors are often a fraction of the cost of new fencing or screening material. Check out Habitat for Humanity ReStores, architectural salvage yards, Facebook Marketplace, or even curbside finds. Repurposing them keeps waste out of landfills and honors the craftsmanship of yesteryear. A quick scrub, a coat of outdoor sealant, or a fresh splash of paint is often all they need to become your balcony's star feature.
Whether you leave them as-is for a rustic look or paint them in a cheerful hue, louvered doors invite you to get creative and make your balcony truly your own.
Sourcing and Preparing Your Louvered Doors
Now that you're excited about the design potential, let's find the perfect louvered doors and get them ready for your balcony oasis. Hunting for old doors is half the fun—and it's a surprisingly affordable way to score unique materials.
Where to Look
You don't need to buy new. Some of the best sources are just a short drive (or click) away:
- Habitat for Humanity ReStore: These nonprofit home improvement stores often have piles of donated interior doors at bargain prices. You'll be giving a door a second life while supporting a great cause.
- Facebook Marketplace & Craigslist: Search for "louvered door" or "interior door" and set your radius. Many people practically give them away during renovations. Be ready to pick up quickly.
- Thrift Stores & Salvage Shops: Goodwill, Salvation Army, and architectural salvage yards can yield hidden gems. Salvage shops sometimes carry period doors with beautiful details.
- Curbside Finds & Community Groups: Keep an eye out on bulk trash day or join a local Buy Nothing group. One person's renovation scrap is another's balcony screen!
Choosing the Right Door
Aim for solid wood doors that feel substantial—they'll hold up better outside than hollow-core versions. Check for structural soundness: no warping, major cracks, or soft spots that suggest rot. Standard interior door widths (24, 28, 30, or 36 inches) work well because they're manageable to handle and create cohesive sections. Even mismatched widths can look intentional if you paint them uniformly.
Don't worry if a door is slightly too wide; you can trim it down with a circular saw, or simply position your screen so the edges overlap. The louvers themselves should be intact. A few chipped slats add character, but if many are broken, pass on it unless you're handy with wood repair.
Cleaning and Sanding
First, remove all hardware: knobs, hinges, strike plates. This prevents rust and makes sanding easier. Give the door a thorough wash with warm water and mild dish soap. Use a soft brush or rag to get between the louvers—an old toothbrush works wonders here. Let the door dry completely in the sun.
Once it's dry, sand the entire surface lightly with 120-grit sandpaper. You're not trying to strip the old finish completely; just scuff it up so new paint or stain will adhere. Smooth out any rough patches or splinters. If there are deep scratches or dings, fill them with wood filler and sand smooth after drying. Wipe off all dust with a tack cloth before moving to the next step.
Finishing for Outdoor Life
Since your screen will face sun, wind, and occasional rain, it needs protection. An exterior-grade paint or stain is essential. Latex exterior paint is user-friendly, dries quickly, and comes in any color imaginable. Go bold with a sunny yellow or soothing sage to match your balcony vibe. Or use a solid-color exterior stain if you want to let a hint of wood grain show through.
Apply two thin, even coats, allowing proper drying time between them. Use a brush for detailed areas around louvers—a small foam roller can speed things up on flat sections. If you're hanging the doors horizontally as a screen, remember to paint both sides; moisture can seep in from the back. A final clear sealant adds extra durability but isn't mandatory if you use quality exterior paint.
With your doors now transformed into weather-ready pieces, you're all set to assemble your privacy screen. In the next section, we'll walk through the simple framing and hanging process.
Building the Modular Screen: Connecting Doors
Now that your louvered doors are cleaned up and ready, it’s time to turn them into a functional privacy screen. The key to a sturdy, long-lasting structure is careful measuring, the right hardware, and a little patience. You don’t need advanced carpentry skills—just a few basic tools and a willingness to take it step by step.
Gather Your Tools and Hardware
Before you start, make sure you have everything on hand. You’ll need:
- A drill with a set of bits (wood or multipurpose)
- Screws that are shorter than the combined thickness of the door stile and hinge leaf
- Hinges (at least three per door joint; choose butt hinges, continuous hinges, or even decorative strap hinges)
- A measuring tape
- A spirit level
- Pencil for marking
- Optional: corner brackets (L-brackets) and small wood screws for reinforcement
If you’re making a folding screen, you’ll also need hinges with removable pins if you ever want to take the screen apart for storage or moving. For a fixed panel, simple butt hinges work perfectly.
Decide on Your Configuration
Think about how you’ll use the screen on your balcony. A folding accordion-style screen is fantastic for flexibility—you can adjust the angle, create a cozy nook, or fold it flat against a wall when not needed. It works well on narrow balconies where you might want to tuck the screen away. A wider fixed panel, on the other hand, can serve as a semi-permanent partition. You can attach it directly to a railing or wall with brackets, or build a freestanding base.
For a folding screen, each door will connect to the next with hinges on alternating sides, forming a zigzag that stands on its own. For a flush flat panel, you’ll butt the doors edge-to-edge and secure them with flush brackets or mending plates on the back, which keeps the front clean.
Attach the Hinges Evenly
Let’s walk through joining two doors with hinges—this same process is repeated for each additional door.
- Position the doors: Lay both doors flat on a clean surface, with the edges you want to join butted together. If the louvered slats protrude, use scrap wood underneath to keep them stable and level.
- Mark hinge placement: Using your measuring tape and pencil, mark the hinge locations on both doors. A good rule of thumb is to place the top hinge about 6–8 inches from the top, the bottom hinge 6–8 inches from the bottom, and one or two more evenly spaced in between. For standard door-height screens (around 80 inches), three hinges are usually sufficient; for taller or heavier doors, add a fourth.
- Trace the hinge outlines: Holding each hinge in place (with the knuckle just past the door edge), trace its outline with a pencil. This ensures the hinges will be aligned across both doors.
- Pre-drill holes: Remove the hinge and drill pilot holes at the marked screw locations. Pilot holes prevent the wood from splitting and make driving screws much easier.
- Screw the hinges in place: Start with one door. Position the hinge leaf on your traced outline and drive the screws in partially, then check alignment with a level before fully tightening. Repeat for the other door, making sure the gap between doors is consistent and the screen sits flat when opened.
If you’re making a folding screen, the hinges should alternate sides so the doors fold like an accordion. For a fixed flush panel, use flat mending plates or continuous hinges along the back edges instead of visible hinges on the front.
Reinforce for Stability
Freestanding screens need a little extra love to stay upright on a breezy balcony. Here are a few ways to beef up your screen:
- Corner brackets: After joining all doors, attach small L-brackets inside the top and bottom corners (on the back side) where the stiles meet. This adds rigidity and prevents wobbling.
- Wider base: If your screen feels tippy, widen its footprint. You can screw a horizontal 1x4 board along the bottom edge of the outermost door panels, letting it extend a few inches on each side. Paint or stain it to match, and it will act like a foot.
- Anti-tip hardware: For a permanently placed fixed panel, use angle brackets to secure the top of the screen to a wall or railing (check your lease or building rules first).
Finally, test everything. Stand the screen up on your balcony, adjust the folding or positioning, and gently push on it from different directions. If it wobbles, don’t panic—tighten any loose screws, adjust the feet, or add a small sandbag behind the base for extra weight. Your privacy screen should feel sturdy and secure, ready to be styled with plants or lights.
Installing the Screen on Your Balcony (No Drilling Methods)
Getting your privacy screen securely in place without damaging walls or railings is easier than you might think—and it’s a must for renters. The key is to work with your balcony’s existing features and use weight, tension, or clever attachment tricks that leave no trace.
Freestanding with heavy planters or weights
The simplest approach is to let gravity do the work. Place the bottom of your assembled louvered-door screen on the balcony floor, then brace it on both sides with large, heavy pots or decorative outdoor weights. Fill tall planters with potting soil and rocks, or use concrete weights covered with a pretty planter sleeve. When positioned snugly against the screen, these act like sturdy bookends—no tools required. For wider screens, add a weight in the center for extra stability. Just be sure the screen stands upright and doesn’t lean; adjust the planters until it feels solid.
Tension rod method for added security
If your balcony has a solid ceiling or overhang, a twist-and-lock tension rod (like a shower rod) can give your screen a second anchor point. Extend the rod vertically between the floor and ceiling near one side of the screen, making sure it’s very tight. Then use zip ties or sturdy twine to fasten the screen’s frame or louvers to the rod. This prevents the screen from tipping forward or sliding, while still keeping the setup completely damage-free. You can use one rod per section or a single rod for a smaller screen.
Attaching to railings with zip ties
For a semi-permanent hold, thread heavy-duty UV-resistant zip ties through the louvers and around your balcony railing. This works especially well with metal or wooden railings and keeps the screen flush to the edge. Snip the ties extra long and tuck the tails behind the slats so they’re hidden. While this method won’t harm the railing, always check your lease or ask your landlord first, since some consider it a modification. If you go this route, it’s easy to reverse—just snip the ties and they’re gone.
Wind safety and anti-tip precautions
Louvers let some wind pass through, but a strong gust can still topple a freestanding screen. Keep an eye on the forecast and, if extreme weather is expected, simply lay the screen flat or bring it inside temporarily. If you must leave it up and your balcony has a brick or concrete wall, you can use removable adhesive hooks paired with furniture anti-tip straps as a last resort. Attach the adhesive side to the wall (never to painted or delicate surfaces), and the strap to the screen’s frame. This adds a backup tether, but always test in calm conditions first and never rely on it alone in high winds. Combining heavy base weights with a tension rod is often enough for most breezy days.
All these methods keep your space damage-free and your security deposit safe, so you can enjoy your new privacy screen with peace of mind.
Styling and Plant Pairing for Your New Privacy Screen
Now that your louvered door privacy screen is in place, it’s time to turn it into a lush, eye-catching feature. With a few simple additions, you can weave your screen into your balcony garden’s overall look and feel—whether you crave a tropical hideaway or a romantic nook. Let’s explore easy, renter-friendly ways to style and plant up your new privacy wall.
Start with color. A fresh coat of paint can tie the doors into your existing outdoor decor. Choose a hue that complements your furniture and planters—soft sage for a serene vibe, bold teal for a pop of personality, or classic white to brighten a small space. Use exterior-grade paint for durability, and remember that lighter shades can help the screen feel less bulky.
For a living wall effect, attach a lightweight trellis panel to the back or front of the doors. This gives climbing plants a path to weave through the louvers. Top picks for balconies include star jasmine for its fragrance, clematis for showy blooms, or sweet potato vine for quick, trailing coverage. In containers at the base, train the stems upward with soft ties. As they grow, they’ll fill the spaces with greenery and blooms, softening the hard lines of the louvers.
Maximize vertical space by hanging small planters directly from the louvers using S-hooks. Look for lightweight pots with drainage holes, and choose plants that cascade, such as string of pearls, trailing nasturtiums, or even herbs like creeping thyme. This trick works especially well if your balcony floor is limited—each louver becomes a potential shelf for greenery.
Add ambiance with outdoor fairy lights draped along the top edge or woven through the slats. Battery-operated options with timers are perfect for balconies without outlets. For a softer, boho feel, consider lightweight sheer curtains hung on a tension rod or clipped to the louvers. They flutter in the breeze and make the space feel airy and intimate—ideal for evening unwinding. Just make sure all fabrics are outdoor-safe and won’t mold in humidity.
Mix and match these ideas to suit your style. The beauty of a DIY privacy screen is that it’s a blank canvas—so play around until it feels like your own secret garden.
Maintenance and Weatherproofing Tips
To keep your louvered door privacy screen looking great and functioning well season after season, a little ongoing care goes a long way. The key is protecting the wood from moisture, sun, and general wear.
Seal the surface. Before placing your screen outdoors, coat all exposed wood with a quality marine varnish or exterior-grade polyurethane sealant. This clear finish blocks UV rays and repels rain, preventing cracking, warping, and discoloration. Reapply every one to two years as needed, especially if you notice water no longer beading on the surface.
Keep it clean. Pollen, dust, and city grime can build up on louvers quickly. Wipe them down every few weeks with a dry microfiber cloth or a slightly damp rag. Avoid harsh chemicals—just mild soap and water for stubborn spots.
Check for damage. Each spring and fall, give your screen a visual once-over. Look for soft spots (signs of rot), peeling finish, or small holes that might indicate insect activity. Sand and touch up any bare patches with matching exterior paint or a fresh coat of sealant to stop problems before they spread.
Winter wisdom. If you live in a region with freezing temperatures or heavy snow, consider removing the screen and storing it in a dry garage or shed for the winter. Not possible? Wrap it in a breathable outdoor cover or tarp, securing it tightly so wind doesn’t get underneath. This extra step can add years to its life.
FAQ
Can I use hollow core louvered doors instead of solid wood?
Hollow core doors are lighter and easier to handle, but they are less durable outdoors and may warp or rot quickly. If they are made of wood, sealing and painting can help, but solid wood or exterior-grade doors are a better long-term solution. For a temporary screen, hollow core can work if well protected.
How many doors do I need for a 6-foot wide screen?
Standard louvered doors are usually around 18 to 24 inches wide each. For a 6-foot screen, you'll likely need three to four doors, depending on their exact width and the desired overlap. Measure your available space and plan for a slight gap or overlap for a clean look.
Will this privacy screen withstand strong winds on my balcony?
Heavy louvered doors can catch wind and may become unstable. Secure them to the balcony railing with sturdy brackets or straps, and consider anchoring them to the floor or wall if possible. In very windy conditions, you might need to temporarily remove or fold the screen for safety.
Is this project suitable for a rental apartment? Do I need permission?
Yes, but always check your lease and local regulations first. Since the screen is typically freestanding or attached without permanent alteration, it is often allowed, but some buildings have strict rules about balcony appearance or attachments. It's best to get written permission from your landlord or management to avoid issues.
Should I paint or stain the louvered doors for outdoor use?
Yes, exterior-grade paint or stain is essential to protect wood from moisture and UV damage. Paint offers more color options and a thicker protective layer, while stain highlights the wood grain but may require more frequent reapplication. Use products specifically labeled for exterior wood.
How can I make the screen more private if the louvers don’t close completely?
You can attach lightweight fabric, reed fencing, or decorative mesh behind the louvers to block sight lines. Alternatively, adjust the louvers to overlap more if possible, or add plants in front to fill gaps. Frosted window film applied to glass louvers is another effective, renter-friendly option.